WHAT'S CUBE ?
Description :
The initial idea was to make a cube within a cube, with a rubik’s cube type manipulation. I refined my ideas, researched, prototyped, to get where I am now.
This project is much more mature than the first one, I launched it with precise ideas, more game and level design notions. And above all with more experience gained through my internships.
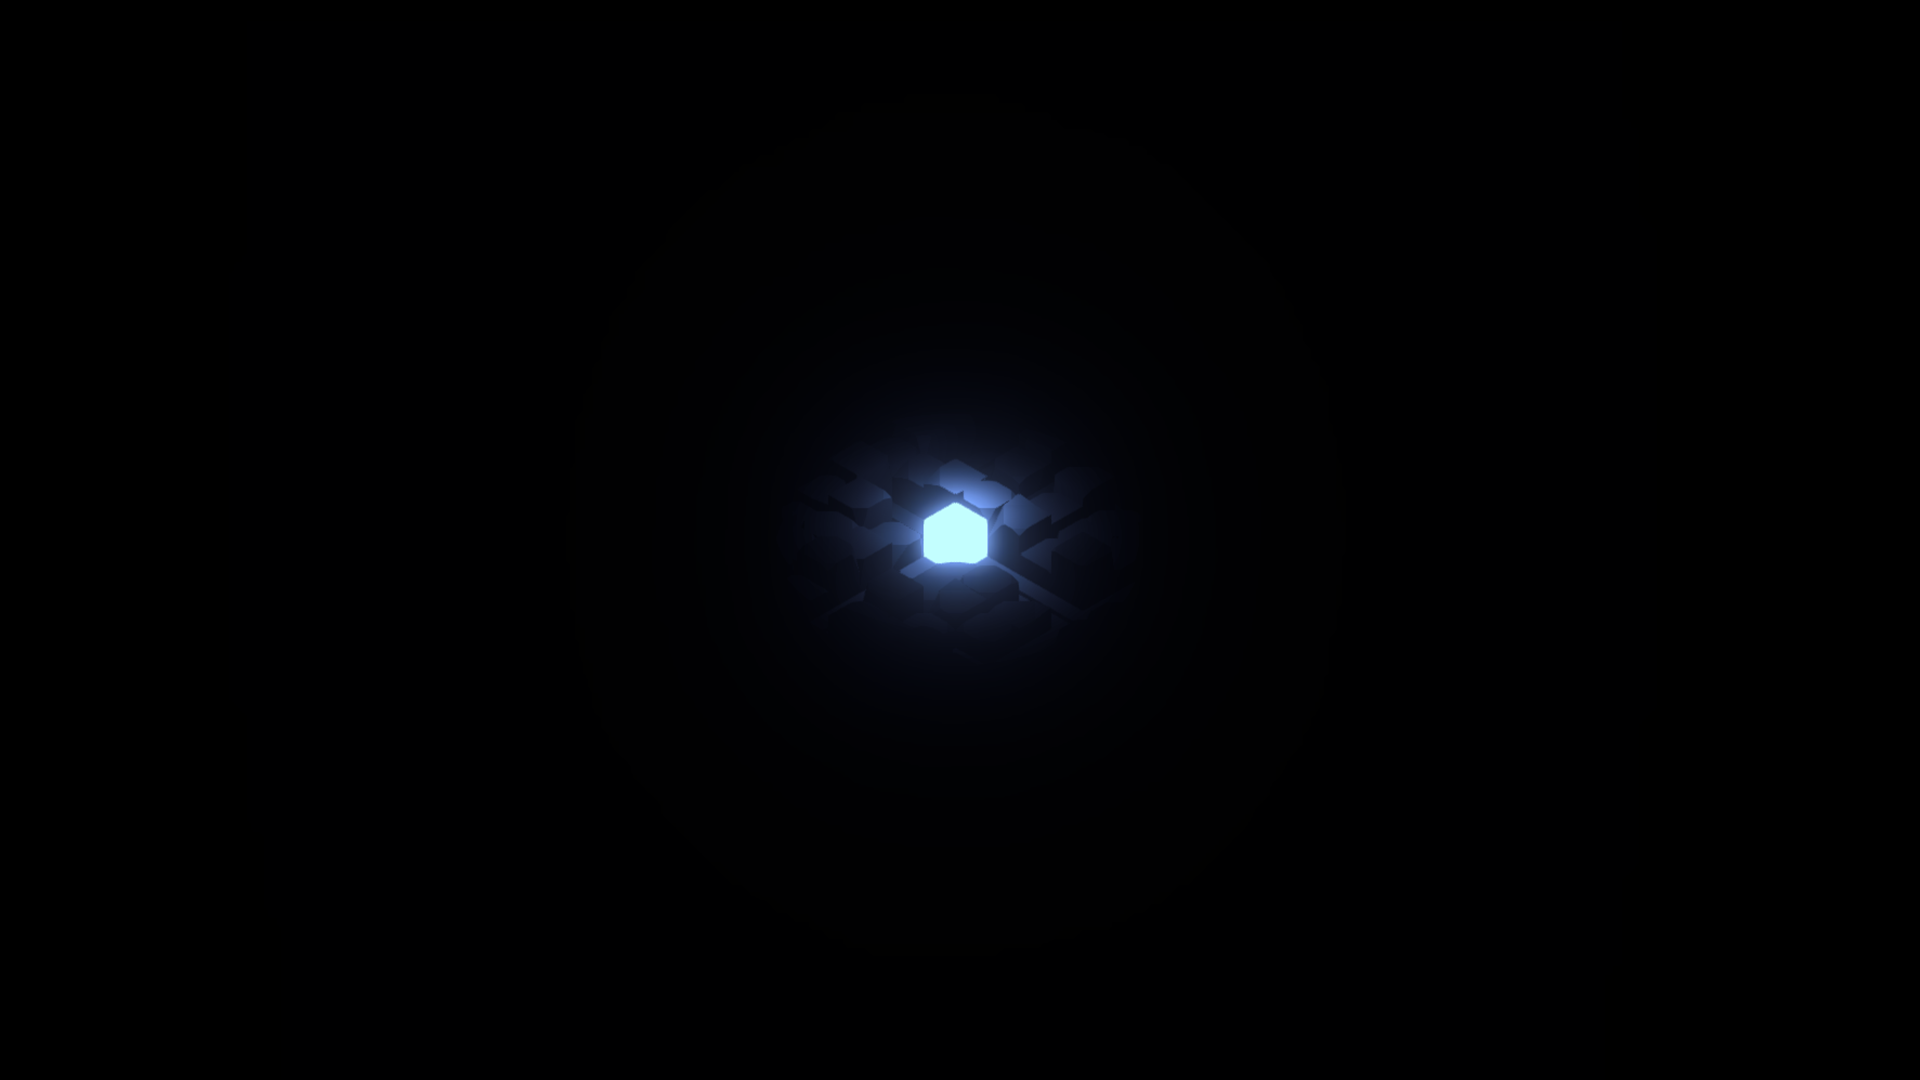
Cube is an isometric narrative labyrinth in a small space with a dark but relaxing atmosphere. The player will have to reach the light to discover the mysteries behind these walls…
Some data :
1
I'm alone on the project.
6
Months currently working on the project.
Objectives :
The goal is to learn even more by doing a new project. I had this idea for a game and I set out to make what I imagined real.
The idea was to really succeed in creating an atmosphere that was a bit obscure and oppressive but at the same time, restful. Thanks to the light, the sound design and the way the player moves.
I would like to be able to publish it on Steam, and maybe propose it on the playstore, I thought about the moving system with the possibility to make it work in touch mode.
GAME DESIGN DOCUMENT :
STEPS OF DEVELOPMENT :
I - Camera :
Initially the camera was to move from face to face, according to a face-to-face system. For example, the top face of the cube will have as neighbor all the other faces except the bottom one.
But after several tests, even by modifying the player’s movement system (which I will explain in the second part), the result was not satisfactory.
Because it turned too much in all directions and above all we could only see one side of the cube on camera. So the analysis of the labyrinth could not have been optimal and the visual rendering would not have worked well.
Here is an example of the first version of the camera movement:
It is important to know that it is the camera that moves around the object and not the other way around, because the player is on the object so it is the only possible solution to be able to see all the faces of the cube (except the bottom one which is not used).
The isometric point of view is the one that allows to see the most faces of a cube at the same time (3 faces). So I decided to use an isometric view for my project. Because it seemed to me that it was the most coherent for the player to get information about the labyrinth.
And here is the result:
The last step for the camera is to go to the face where the player is located, if it is no longer visible during a teleportation, or to change faces if we decide to go to another face.
I design my scripts in the most modular way possible to be able to make changes quickly via the Unity inspector, basically I avoid constants in the code, for example this is how the camera manager script is displayed in the Unity inspector:
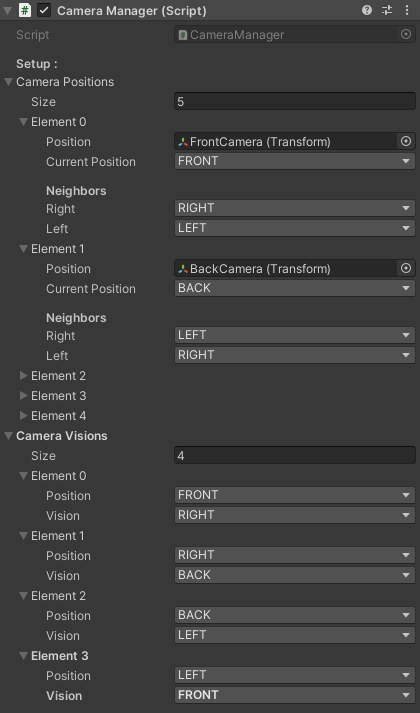
This system was not difficult to set up because I made sure to create my neighboring face system in a rather modular way. So its implementation was much simpler than the design of the basic camera system, which was already a nice job, but not as difficult as the controls, which we’ll see now…
II - Controls :
I already had the basic character controls in mind when I started the project. My move logic is simple: when the player launches a move, it cannot be stopped until the player encounters an obstacle (mainly walls). To simplify, the player only has to press the direction button once, and he will move on his own until he stops when he hits a wall. He will obviously be able to interact to change direction when there is a hole in the wall, to turn left, for example.
To manage this system, I placed 4 sensors on each side of the player that will be able to detect if the player can turn or if he is in contact with a wall.
This brings us to the most difficult part of the programming side of the project: moving on and according to the faces. I will explain briefly because a diagram will be more understandable. Each face of the cube has a different orientation in space (x, y, z), and when we have to move to the right on the left face of the cube, we will have to change the values of the Z axis for the movement. However, if we want to do the same thing on the front face of the cube, it will be on the X axis.
Here is a diagram that will make it much clearer:

I remind you that it is the camera that moves around the object. Therefore, the top face is always visible no matter what the position of the camera. This also affects the direction of movement in space for the player.
Because if we don’t differentiate the movement on the upper face according to the position of the camera, it is the player who would need to adapt and would therefore have the feeling of moving upside down in some cases… This was not possible. So I had to take this parameter into account and create, in addition to the 4 specific movements for the faces on the side of the cube, the 4 other possible cases for the top face.
It wasn’t easy, even rather long, but I calmly put all the cases on paper and was able to program it cleanly to get the desired result.
III - Character :
On the character’s side, it’s very simple: he can only move around, take teleporters, and go from front to front. Visually, I wanted something simple, so a cube was perfect to keep the idea of the cube within a cube.
VI - Sounds :
The sounds are made by a friend, and I take care of implementing them. I found something very interesting:
Often, in personal projects, you take care of the sound at the very end or very late in the project. However, I took care of it after I finished my 3Cs, and I found that doing an implementation earlier allowed me to discover bugs that you couldn’t see without the sounds. This enabled me to do a quick and efficient debug pass, as the code was still fresh in mind.
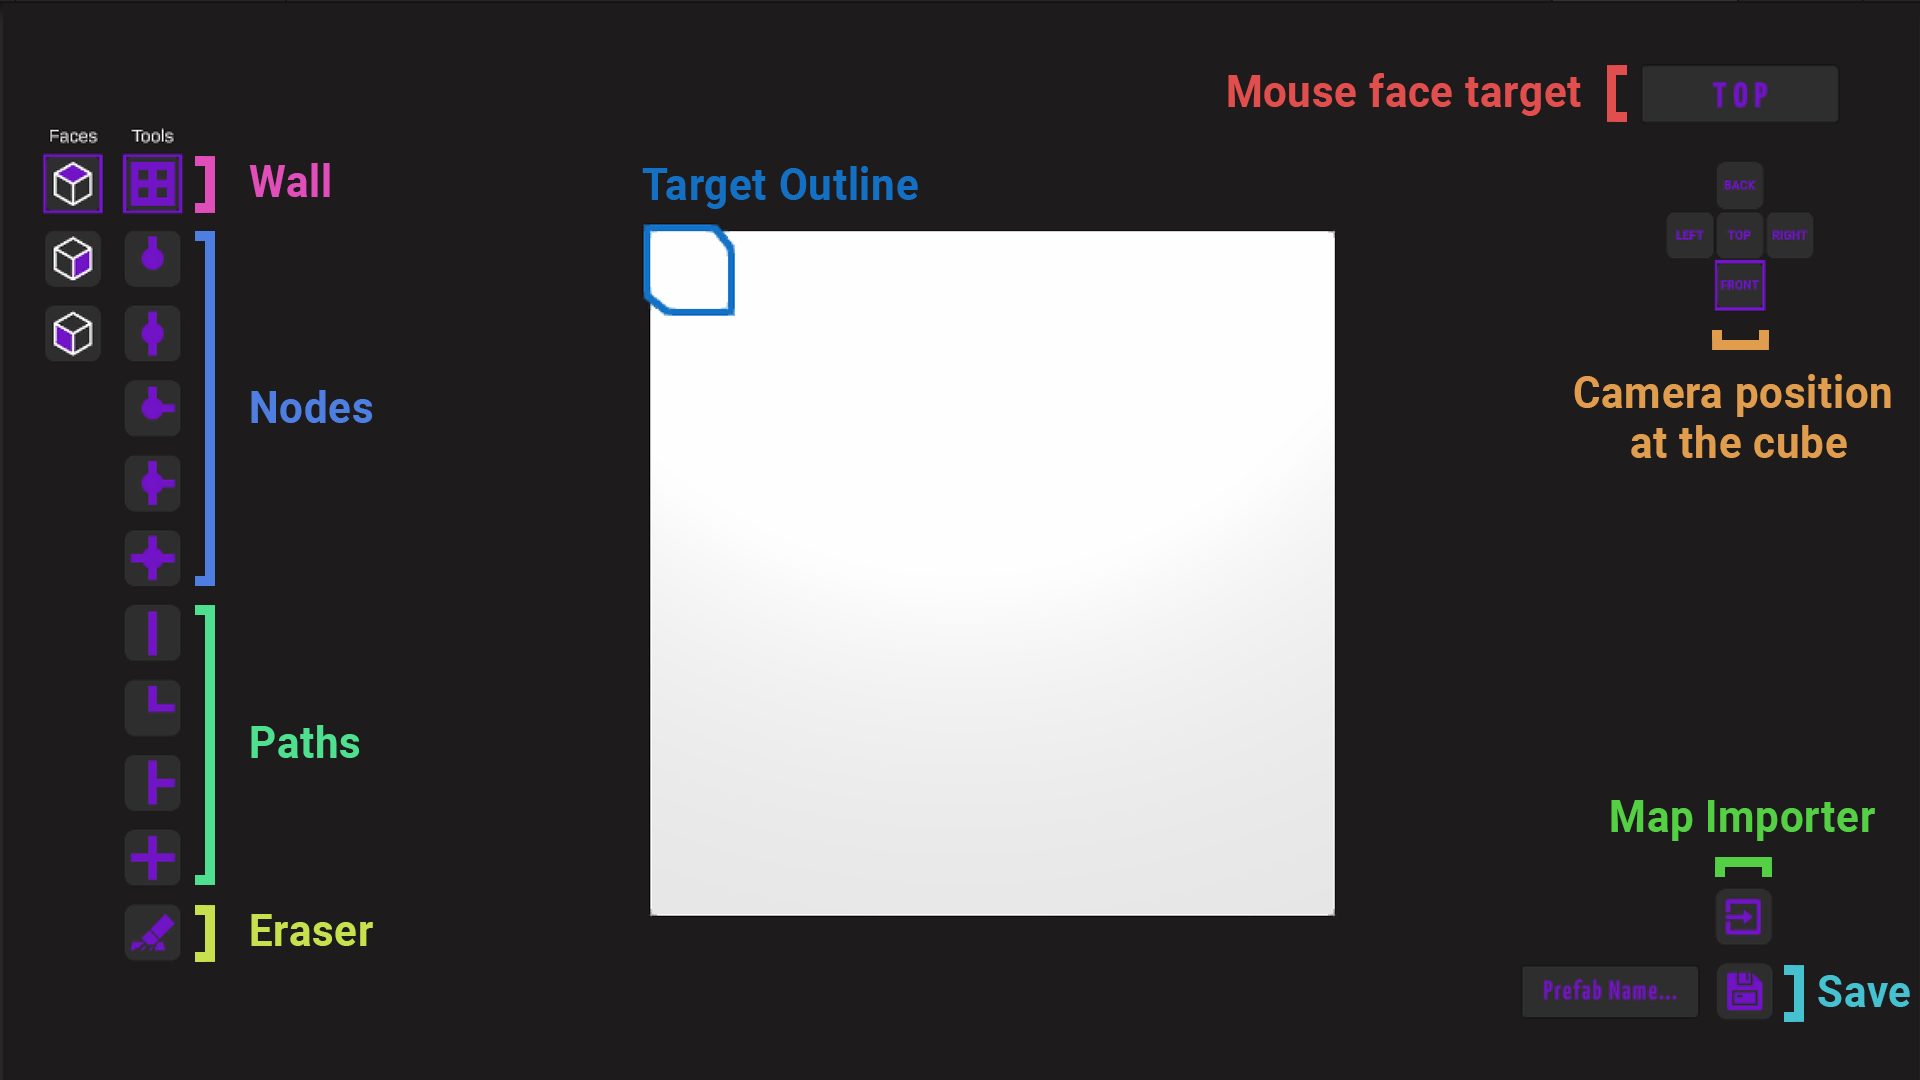
MY MAP EDITOR TOOL :
Map Editor :
We finally arrive at a tool that I am very proud of, which will make my life easier for designing my levels and, above all, is adapted to my needs.
Its creation took me some time, and it may not be finished, as I will surely have ideas for improvement depending on the cases I will meet, but it is time saved in the long run.
At the beginning, I had the idea of a map generator based on a drawing, which would recognize the colors and place the object corresponding to the color. However, when I started to have a prototype, I understood that this was not going to be the best way to handle retouching.
Here is an example of how it worked as a system of creation through a drawing:
Then I decided to go for a real-time modification, like a real field editor (but in-game). The operation is rather simple: when I click, I send a raycast towards my click. The raycast will hit the target cube, and based on the object I had chosen to place, it will be instantiated at the position of the target cube.
The result of the prototype:
I was happy with the result, I had the base I wanted, but I was faced with complications. Some cubes from one side will be shared with another side (see picture below). But I wanted to be able to modify these cases as well because my system didn’t allow me to at first. So, I had to adapt my code to be able to take into account these problematic cases and get a more complete version of my map editor.
And here is the current result which satisfies me amply for the moment:
Features of the tool :
CONCLUSION :
I’m learning a lot with this project, whether it’s in the organization with the management of priorities, time, but also in the further production of a game. Thinking about how to optimize your production pipeline, with the creation of a map editor to simplify your life. Researching and fixing bugs, improving gameplay and design. All this allows me to improve and surpass myself to produce a game I’m proud of.
GAME TRAILER :
DEMO :
(There maybe some bugs, the project still in work in progress…)